
General Guide
You don't need to do everything at once. Build one working team, save your crystals, and use that team to earn the materials and equipment for your next step.
Adapted from Monokhrome's Grand Summoners Newbie Guide. The in-game screenshots below also come from that guide; open any image to see it at full size.
On this page
Your first week
Finish the tutorial first. If you want to reroll—restart a new account to try for better starting summons—decide before you spend time upgrading it. The best starting units depend on the banners available when you join.
Then follow this order:
- Play the main story. Take advantage of the new-account offer of zero Energy cost for the first seven days. First clears earn crystals, and completing Chapter 5 unlocks Side Stories.
- Build one team you can use now. Start with two units that fill the team’s Arts gauges, one damage dealer, and one unit that helps with the quest. See Building a team.
- Upgrade those units. Farm the Giant Bosses that drop their awakening materials. Leave units you aren’t using for later.
- Get useful equipment. Start with the equips marked “First” in Equipment, especially ones that fill Arts gauges.
- Farm the current events. Check Events for what is open. Give limited crossover rewards priority before the event ends.
Auto and Auto-Advance help with easy story quests. When you hit a difficulty spike, stop and read the boss mechanics. A different team or defensive equip may help more than another level.
Keep these three habits: save crystals for worthwhile guaranteed summons, lock valuable units, and upgrade the team you actually use.
Every day
Start with the first two tasks. Add the rest as you unlock them and your team becomes strong enough.
| Priority | What to do | Why it helps |
|---|---|---|
| 1 | Clear the Daily Quest. | Gather materials and progress weekly missions. |
| 2 | Check Daily Missions, including cooking food and clearing a multiplayer battle. | Collect the daily rewards. |
| 3 | Farm an event you need rewards from. | Limited shops and rewards disappear when the event ends. |
| 4 | Use your free Summoners’ Road attempts. | Save Soulgems for Dream Awakening and Ascension. Clearing only the early stages is fine. |
| 5 | Use Arena attempts and Grand Crusade AP; try Mines or Raids when available. | Work on these once the essentials are covered. |
You don’t need to clear every mode every day to make progress.
Where to play
Most rotating quests are in Exploring. A useful default order is story → limited events → Giant Bosses → Side Stories. Move an event up the list if it is about to end.
Events and crossovers
Clear the stages you can, then farm SPEX or higher once you can beat it reliably. Multiplayer can make farming easier and add Luck drops. Spend the event currency in its exchange shop before the exchange deadline.
If you cannot buy everything, the source guide’s suggested order is:
- Limited S Potions and crossover emotes.
- Unit and equip Limit Break stones.
- Crossover Luck Gems and summon tickets.
- Farmable equips, then ordinary materials.
Adjust this for what you need: a useful upgrade can matter more to your account than a collectible emote. Crossover rewards deserve attention because a rerun is not guaranteed.
Giant Bosses
Farm these for the materials your units need to awaken. Clear each quest once for its first-clear rewards, then repeat the one that drops your missing material. Bosses rotate on different schedules; check Giant Bosses if the one you need is absent.
Trials, Ruins and Assaults
- Dungeon of Trials: climb as far as your team can manage for first-clear crystals.
- Elemental Ruins: aim for the first five stages of the available elements, then go farther if you can.
- Assault events: clear each new rotation, since its first-clear rewards reset.
The source guide places Ruins in the first half of the month and Trials in the second. Use the in-game schedule for the current dates and available elements.
Side Stories and Crest Palace
Side Stories unlock after Chapter 5. They offer first-clear crystals and useful equipment; the starter list below includes several of their drops.
Crest Palace can wait. Crests give extra bonuses, but early on your time is better spent on awakening, equipment, and a team that works together.
Summoning
An 11x summon, also called a multi, pulls eleven units at once. On many unit banners, the first multi using free crystals guarantees at least one 5★ unit. In the source screenshots, that guarantee appears on the purple button.
A guaranteed 5★ is not a guaranteed featured unit. Read the banner’s details and rates before spending. Paid, step-up, ticket, and special summons can have different rules.
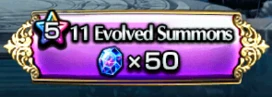
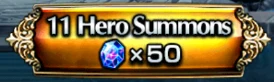
For a new account: take a worthwhile guaranteed summon, then stop. Don’t keep spending just because the first pull missed the unit you wanted.
What pity means
Pity means exchanging enough of a banner’s Hero Gems for a unit listed in its exchange shop. The source guide describes a common setup: one Hero Gem per qualifying multi, with 30 gems needed for a unit.
At 50 crystals per multi, that is 30 × 50 = 1,500 crystals. Check the actual banner before saving or spending toward that target: its cost, eligible summons, and exchange choices are what matter.
Before committing, check all four things:
- Is the unit in this exchange shop? Don’t assume every featured unit is available.
- Which summons give the same Hero Gem? Unrelated banners do not share progress.
- Can you reach the required total before the deadline? Gems do not carry over to a later rerun.
- When does the exchange close? The source describes expiry seven days after a banner ends; use the deadline shown in your shop.
If you are unsure whether a unit is worth the full cost, save and ask for advice with a screenshot of your units. There is no need to decide immediately.
Crossovers and resets
Some crossovers refresh the first guaranteed summon during the event. A reset may also restock the event shop and selected packs. Wait for the official announcement; don’t assume a reset or a particular date.
Use free tickets and any refreshed guarantees before deciding whether to finish a pity. Some events also offer discounted paid-crystal summons. Those require purchased crystals, so they are not part of a free-crystal saving plan.
Which banners deserve attention?
| Banner | Beginner approach |
|---|---|
| Standard unit banner | Take the free daily summon when available. Save crystals for stronger opportunities. |
| Featured unit banner | Check the units, rates, and guarantee. A guarantee alone does not make a banner worth pulling. |
| Deluxe Alch Summon | Consider it if its pool helps your account. The source’s example costs 5,000 Alch, then 7,000, then 10,000; check the current pool and price. |
| All-Star Alch Summon | Usually skip it. A large pool can make a specific featured unit very unlikely. |
| Great Awakening equip summon | The source recommends skipping it: its True Equips can be bought with Rainbow Gems, and its example has no pity. Check the exchange before spending crystals. |
See Summons for banners and the Tier List as a starting point for comparing units. A unit’s usefulness still depends on your team and the quest.
Units: keep or sell
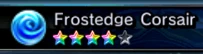
Don’t judge a unit by its current number of stars. Some valuable units need to evolve before they reach 5★. Check the rarity stars and Alch value instead.
- Keep and lock 500-Alch units. The source shows them with rainbow rarity stars, even before they reach their final evolution.
- Ordinary 50-Alch summon units can be sold. Don’t apply this rule blindly to materials, free reward units, or anything you haven’t identified.
- Lock your first copy so you cannot accidentally use the upgraded original as fusion material.
What to do with duplicates
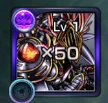
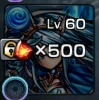
A duplicate summonable 5★ unit can limit break another copy and give 500 Alch. Once the receiving unit is at LB5, further duplicates also give a Rainbow Gem. Check which copy you are keeping before confirming the fusion, and consider whether you need a second usable copy first.
Luck units work differently. These are free units from Trial and Ultra Trial stages. Their special limit-break materials can be farmed in those stages; they do not provide the same Alch and Rainbow Gem rewards as summonable duplicates.
Save your choice tickets
New-player tickets can be exchanged through Town → Alchemist → Exchange. Don’t rush to use the Unit of Choice ticket: its standard-pool units can also appear in ordinary summons. Save it until you know which missing role you need.
The same principle applies to True Equip and equipment tickets: check the choices against your team before redeeming them. Browse your options on Units and Equip.
Upgrading
Invest when a unit solves a problem for your team. A highly rated unit can wait if you are not using it yet. Event shops are a useful source of evolution and awakening materials.
Awakening and Summoners’ Road
For ordinary awakening, collect the materials listed on the unit’s evolution screen. Dragon God Paradisos can come from the hardest Invitation to Evolution stage or an Alchemist exchange. Check the exchange’s full material requirements before farming.
Dream Awakening and Ascension use Soulgems from Summoners’ Road, found under Exploring → Giant Boss.
- A road has five stages, each harder than the last.
- Both units and equips used on a cleared stage become unavailable for later stages in that run. Plan more than one team.
- Use the free attempts shown in-game. The source guide describes three per day; don’t spend crystals on extra runs as a beginner.
- If you can only clear the first one or two stages, leave with those rewards. You can still build up materials over time.
- Check the current schedule for the element you need.
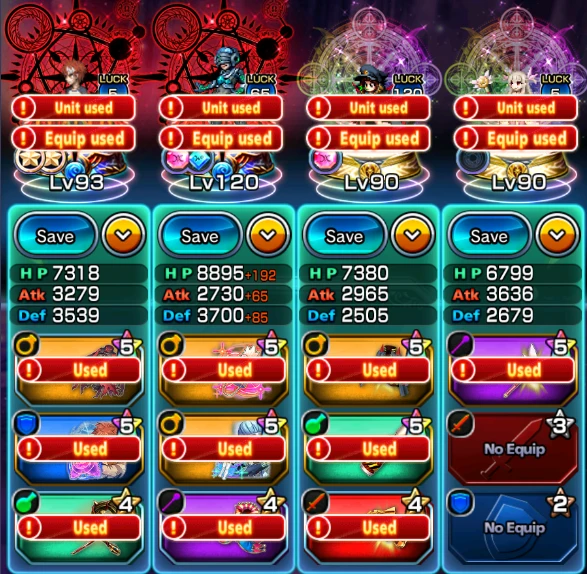
After Ascension, units gain levels through quest EXP rather than Metal Chickens, up to level 120. Let them level while you farm. Check for a useful level-locked passive, but don’t stop all other progress just to reach 120.
Changing a Dream Awakening replaces the previous choice without refunding its materials. Pick a path that suits how you use the unit.
Limit breaking
LB5 means five limit breaks and is the usual starting goal for a unit you actively use. Limit breaking also improves equipment slots and raises the Tasmon stat cap.
Save ordinary Limit Break stones mainly for useful limited units. Standard-pool units may get enough duplicates over time. Stones come from missions, quest rewards, event shops, login rewards, Mines, and Raids; buying them with Alch is usually poor value.
Dream Awakened units can reach LB6, and Ascended units LB7. Going beyond LB5 requires duplicates or rare Expert Limit Break stones (XLB stones). These upgrades are optional for most beginner teams. Check the exact slot improvement before using an XLB stone.
Tasmons, Luck, crests and Max Elixirs
| Resource | What to do early on |
|---|---|
| Tasmons | Use Units → Enhance to add stats to your active team. Limit breaks raise the cap. The Daily Quest and Tasmon Boot Camp help replenish them. |
| Luck Gems | Save them until you know which unit benefits. When spending Luck points on upgrades, the extra crest slot is the source guide’s first priority. |
| Crests | Leave serious Crest Palace farming for later. |
| Flux Drops | Save them for level 4 or higher crests. They reroll the effect, not the crest’s level. |
| Max Elixir | Save for a unit you need fully developed now, especially one that relies on Super Arts. Limit break it to LB5 first so the Tasmon cap is raised. |
A Max Elixir handles level, evolution/awakening, and Tasmons; it does not replace limit breaking. Check the unit and the item description before using one.
Building a team
Start with these four jobs. One unit may fill more than one role.
| Slot | Job | What to look for |
|---|---|---|
| 1 | Arts generator | Fills the whole team’s Arts gauges. |
| 2 | Another Arts generator | Uses an Arts generation effect that stacks with the first. |
| 3 | Damage dealer | Deals the damage type the boss allows, ideally with its own buffs or Arts generation. |
| 4 | Flexible slot | Solves the quest’s main problem: survival, status ailments, breaking, or more damage. |
This is a starting point, not a requirement for every quest. Choose the fourth slot by what goes wrong:
- The team dies: try damage resistance, a shield, a tank, or healing, depending on the attack.
- A status ailment stops you acting: bring the relevant cleanse or immunity.
- The team survives but cannot finish: check damage resistance and boss mechanics before adding more damage.
- The boss must be broken: bring a breaker. Many fights do not need one.
A team full of damage dealers can struggle if nobody fills their Arts gauges. Solve that first.
Arts generation
Arts generation, or artsgen, fills the gauge needed to use Arts, True Arts, and Super Arts. Teamwide generation helps everyone; self-only generation helps just the unit that provides it.
The source suggests roughly 8–10 Arts per second for the team, usually from two or three generators. Treat that as a useful target, not an entry requirement. Effects also need to stay active: a listed rate of 5 per second does not help while the effect is down.
Check whether the effects stack
Many generation-over-time effects belong to a type. Two effects in the same ordinary type do not add together; the stronger one takes effect. Different types can stack.
| Source-guide example | Result while both effects are active |
|---|---|
| Juno: 7/s + Mako: 4/s | 11/s, because these effects stack. |
| War Hero Fen: 4/s + Dark Fen: 3/s | 4/s, because both effects are Type A. |
There are exceptions: some special types stack with other units in the same type, and some effects stack with themselves. Check the Arts Gen Type Chart in Monokhrome’s guide, linked above, for the specific skill and its conditions. Don’t infer the type from the unit’s element.
Equipment generation can stack with unit generation. Two copies of the same equip generally do not stack their generation-over-time effects unless stated otherwise. Instant Arts gives gauge immediately and is useful for getting your first Arts cycle started.
Equipment
Equipment helps your team use Arts sooner, survive attacks, and deal damage. Before chasing a summon-only equip, check what you can farm and whether your unit has the right slot type and rarity to use it.
| Equip type | Useful beginner effects |
|---|---|
| Physical / Magic | Arts generation, damage buffs, or enemy debuffs. |
| Defense | General damage resistance, plus resistance suited to the boss’s damage type. |
| Support | A mix of instant Arts and Arts generation over time. |
| Heal | Healing and the status cleanse the fight needs. |
True Equips have a special passive for a particular unit. That does not automatically make every True Equip your best purchase. Check how much the passive helps and whether a farmable equip already does the job. Some crossover True Equips are available for Rainbow Gems only during their event.
Starter equips you can farm
Start with the cards marked First. Farm the highest difficulty you can clear reliably; use multiplayer if needed. Open a card to inspect its effects and obtain sources. One or two useful copies are a better early goal than collecting everything.
Giant Bosses
 Relic "Lesser Demonheart"Arts generation for one allyFirst
 Relic "Radeus"Arts generation on a PHY slotFirst
 Relic "Force Keratos"Cleanses status ailments except Faint and Disease
 Relic "Logislett"Damage resistance for the teamFirst
 Relic "Dola Armor"Water resistance
 Relic "Claritus"Fire resistance
Side Stories (after Chapter 5)
 Sword of Glorious Will "Grand Destin"PHY damage up
 Magical Hat "Akashic Eye"Arts generation on a MAG slotFirst
 Magical Sword "Siegel"Damage resistance
 Diamond Shield "Adamas Gear"Strong damage resistance on one target, for a tank
 Sacred Crown "Raaz"Damage resistance and status ailment immunity (crafted)
 Magisteel-Toe BootsArts generation for the whole teamFirst
 Shako of Aspiration "Betzfald"A heal, with extras for Light and Spirit units
 Blood Crest "Arc Ignite"Arts for the whole team on a timer
Trial stages (Luck units)
 Gun Sword "Bray Canon"A short ATK buff
 Magical Outfit "Pierrot Crimson"Lowers enemy ATK and DEF
 Armor "Dragon Scale"Damage resistance
See every equip, with filters for type and effect, on Equip.
Auto, AI and multiplayer
Set up Auto before farming
Auto lets you choose when each unit uses its Skill, Arts, and equips: On, Boss Only, or Off. You also choose which Arts to use. Match that choice to the unit’s job—for example, the Arts that provides teamwide generation.
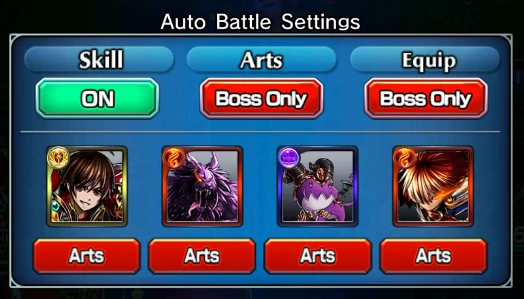
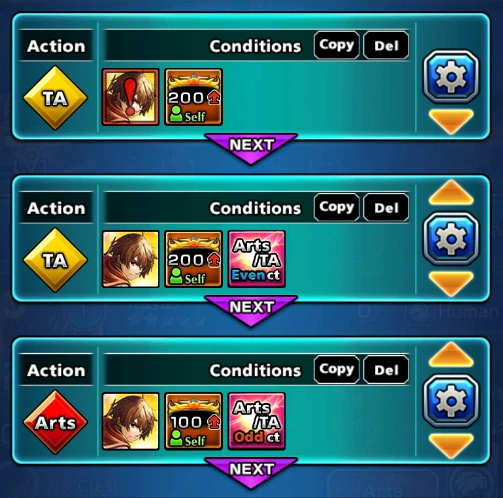
AI gives finer control: up to 20 ordered actions per unit, each with conditions. Higher actions take priority, and all conditions on an action must be met. Start with a small setup, watch a battle, then adjust it. An action list that works for one unit may not work for another.
Farm with other players
Quests shown in red support multiplayer. Tap Join Multi to join an open lobby, or choose Multiplayer on a quest to host one.
- Only the host spends Energy. Joining lets you farm without using yours.
- With two players, each brings two units. With three, the host brings two and the others one each. With four, everyone brings one.
- Ordinary drops can differ between players. Luck drops are shared, and players’ Luck contributes to them.
- Turn on chat for coordination, especially on harder quests.
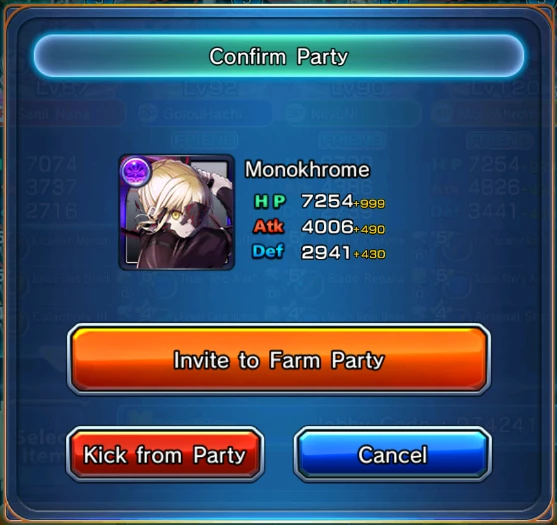
- A host can tap a player’s name and invite them to a Farm Party to keep farming together.
Helping players at rank 80 or below can also earn rewards. Bring a useful unit, follow the lobby’s request, and ask if you are unsure what the fight needs.
Crystals
Story and other first clears give a new account a large early supply. That pace slows down once those quests are done.
The source guide estimates 200–300 free crystals per month afterward, from missions, logins, rotating quests, and events. This is a rough planning figure, not a guaranteed income: it depends on the events and what you can clear.
At that pace, 1,500 crystals represents roughly five to eight months of saving. Treat pity as a planned purchase, not a way to rescue a disappointing summon session.
Glossary
| Term | Meaning |
|---|---|
| Artsgen | Arts generation; sometimes used to mean a unit that provides it. |
| NA / TA / SA | Arts (Normal Arts), True Arts, Super Arts. |
| DPS | A damage dealer; also short for damage per second. |
| PHY / MAG | Physical / magic damage. |
| AWK / DA / SAWK | Awoken, Dream Awoken, Ascended (also called super awoken). |
| LB / MLB | Limit break / max limit break. Players commonly use MLB to mean LB5, even for units that can go higher. |
| LB stone / XLB stone | Limit Break stone / Expert Limit Break stone. |
| TW / RBG | True Equip (true weapon) / Rainbow Gem. |
| Alch | Alchemy Stones, a currency used for certain summons and exchanges. |
| CT | Cooldown timer: how long before a skill or equip can be used again. |
| Pity | Exchanging enough banner currency for a listed unit. Check the banner’s required total. |
| SPEX | An event difficulty commonly used for farming. |
| Box | Your collection of units or equipment. |
| MD / UMD | Magia Drive / Unlimited Magia Drive, mechanics used by certain units. |